
885.6K
Downloads
771
Episodes
Providing ideas and resources for K-12 teachers and school-based administrators.
Episodes
Friday Jan 03, 2025
Friday Jan 03, 2025


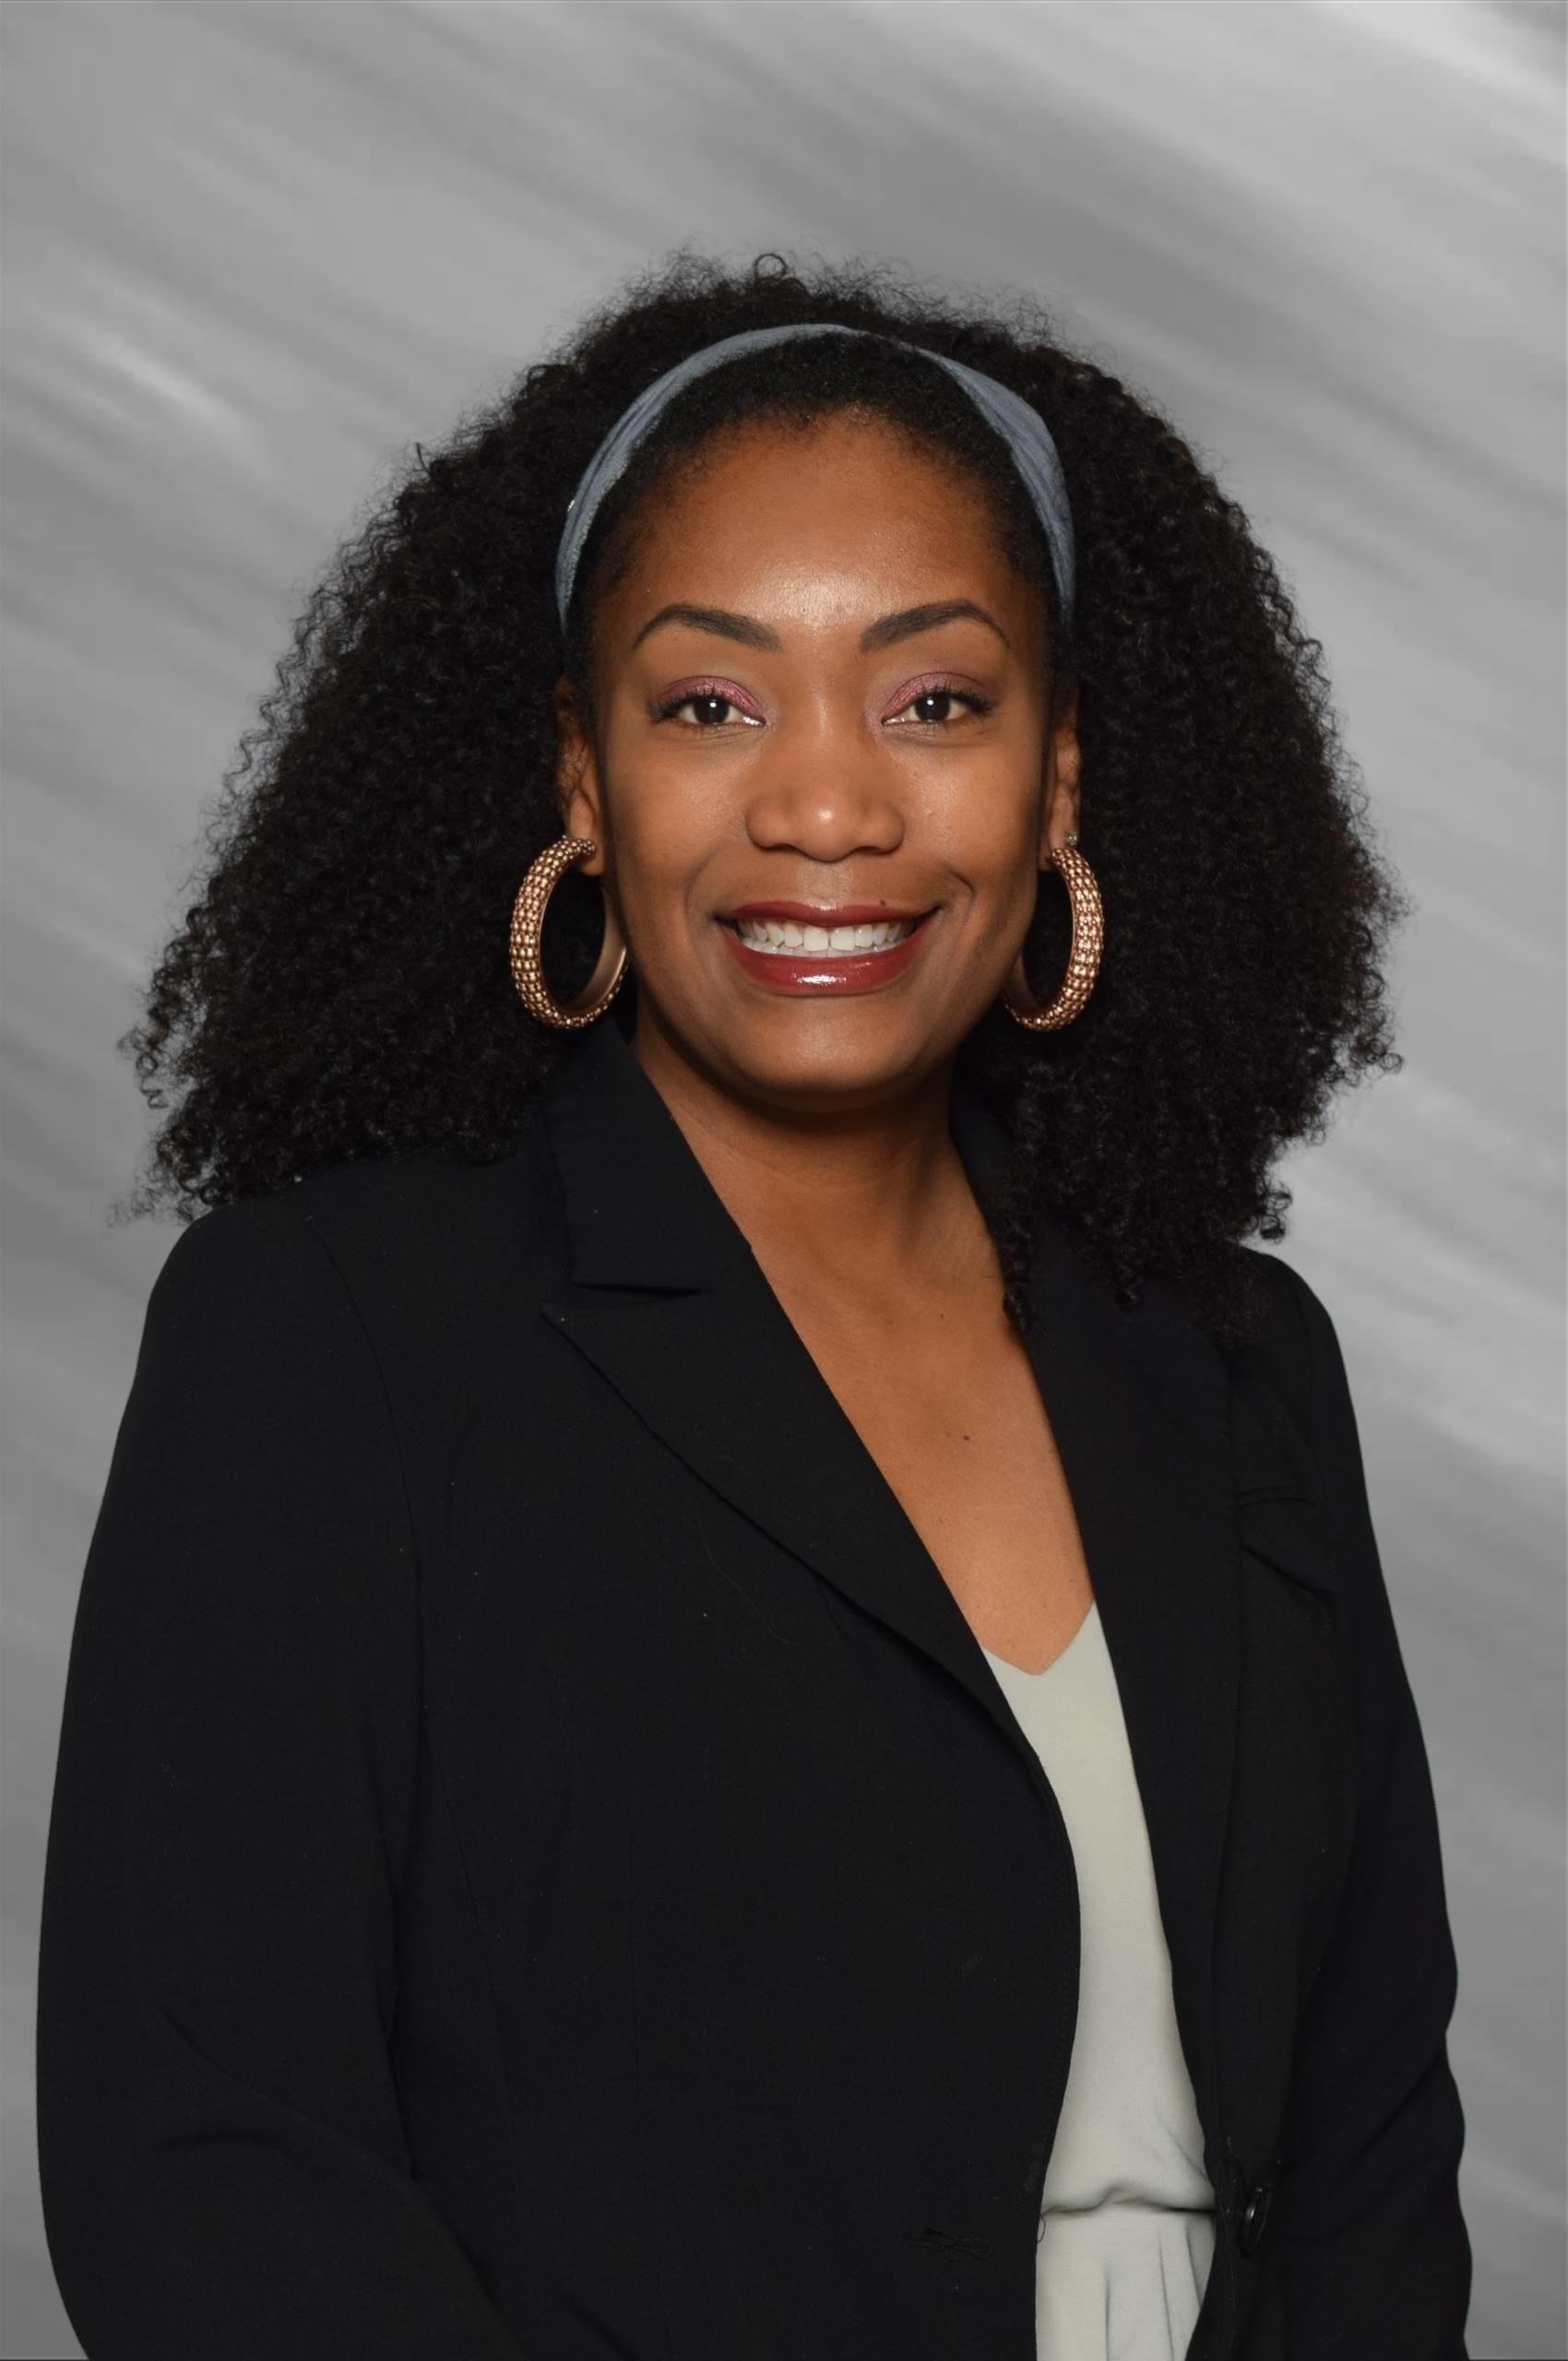
Monica Burns - EdTech Essentials: 12 Strategies for Every Classroom in the Age of AI, 2nd Ed. This is episode 731 of Teaching Learning Leading K12, an audio podcast.
Dr. Monica Burns is an EdTech and Curriculum Consultant, author of EdTech Essentials: 12 Strategies for Every Classroom in the Age of AI, 2nd Edition (ASCD & ISTE, 2024) and former New York City public school teacher. She works with schools and organizations around the world to support PreK-20 educators with thoughtful technology integration. Monica’s website ClassTechTips.com and Easy EdTech Podcast help educators place “tasks before apps” by promoting deeper learning with technology.
Our focus will be Monica’s book - EdTech Essentials: 12 Strategies for Every Classroom in the Age of AI, 2nd Edition, her podcast - Easy EdTech Podcast, and her website - ClassTechTips.com.
Thanks for listening!
Please share!
Before you go...
You could help support this podcast by Buying Me A Coffee. Not really buying me something to drink but clicking on the link on my home page at https://stevenmiletto.com for Buy Me a Coffee or by going to this link Buy Me a Coffee.
This would allow you to donate to help the show address the costs associated with producing the podcast from upgrading gear to the fees associated with producing the show. That would be cool. Thanks for thinking about it.
Hey, I've got another favor...could you share the podcast with one of your friends, colleagues, and family members? Hmmm? What do you think? Thank you!
You are AWESOME!
Connect & Learn More:
https://classtechtips.com/podcast/
https://www.amazon.com/stores/Monica-Burns/author/B01A1A83M0
https://twitter.com/classtechtips
https://instagram.com/classtechtips
https://pinterest.com/classtechtips
https://linkedin.com/in/monicaaburns/
Length - 40:18
Friday Dec 20, 2024
Friday Dec 20, 2024


Favorite Tech Gifts at Christmas with Will & Josh from the HiTech Podcast. This is episode 730 of Teaching Learning Leading K12, an audio podcast.
Will and Josh of the HiTech Podcast are on Teaching Learning Leading K-12. This is our 2nd Annual Christmas show. We are focused on our favorite tech gifts. We had a blast! Will and Josh are always fun to talk with! I am so glad that I was invited to participate. After we introduce our favorite tech gifts, we then rate them. make sure that you go to their YouTube channel so that you can see what we are talking about. But do that after you have listened here.
A little about the HiTech Podcast...
The HiTech Podcast started because two friends couldn't shut up about their jobs and their wives were tired of listening to it on date night. So, we decided to bring our conversation to you, sharing our expertise and tomfoolery for all to hear.
We exist to help you, and ourselves, process the best ways to harness technology in the traditional or virtual classroom.
Here's a little about Josh…
A lover of technology, theology, and learning. I found my love for education early on as a college student. Higher education changed my life and that experience pushes me to always pursue better learning experiences. I am always looking for ways we can harness tech to enhance our teaching and learning.
And some about Will…
An educator by heart and practice. I caught the bug for teaching in the martial arts, but I extended that into higher education and non-profit education. Always looking to find the best tools and methods to solve our teaching and learning problems.
We had a blast, and you will too!
Thanks for listening!
Please share!
Before you go...
You could help support this podcast by Buying Me A Coffee. Not really buying me something to drink but clicking on the link on my home page at https://stevenmiletto.com for Buy Me a Coffee or by going to this link Buy Me a Coffee.
This would allow you to donate to help the show address the costs associated with producing the podcast from upgrading gear to the fees associated with producing the show. That would be cool. Thanks for thinking about it.
Hey, I've got another favor...could you share the podcast with one of your friends, colleagues, and family members? Hmmm? What do you think? Thank you!
You are AWESOME!
Connect & Learn More:
https://www.instagram.com/hitechpod/
https://www.youtube.com/@hitechpodcast
https://twitter.com/hitechpodcast/
https://www.linkedin.com/company/hitechpodcast/
https://podcasters.spotify.com/pod/show/hitechpod
Length - 1:05:39
Friday Jun 28, 2024
Friday Jun 28, 2024


![]()
Will Illingworth & Josh Swartz - HiTech Podcast - talk with Steve about Old Tech We Have Found and Compare It to New Tech. This is episode 689 of Teaching Learning Leading K12, an audio podcast.
Will and Josh from the HiTech podcast are back and today we are focused on some old tech that we have found. We spent a couple of months visiting garage sales, estate sales, and stores like Good Will. The purpose was to see what cool old tech we could find and share on the show.
We bring to the table a telescope, scanner, a unique phone, a couple Walkman, a Palm Pilot III, and a movie camera, editing station, and a home movie projector. We share our technology from the past and compare it to technology from today. It is amazing how much old tech has been replaced by one device - Do you know what that device is?
We had a blast talking about old technology.
Thanks, Will and Josh for the great discussion!
That was fun!
Remember to share with your friends, colleagues, peers, family, and everyone else.
Before you go...
You could help support this podcast by Buying Me A Coffee. Not really buying me something to drink but clicking on the link on my home page at https://stevenmiletto.com for Buy Me a Coffee or by going to this link Buy Me a Coffee.
This would allow you to donate to help the show address the costs associated with producing the podcast from upgrading gear to the fees associated with producing the show. That would be cool. Thanks for thinking about it.
Hey, I've got another favor...could you share the podcast with one of your friends, colleagues, and family members? Hmmm? What do you think? Thank you!
You are AWESOME!
Thanks so much!
Connect & Learn More:
HiTech Podcast (edupodcastnetwork.com)
HiTech Podcast on Apple Podcasts
HiTech Podcast with Will and Josh - 608 (stevenmiletto.com)
Length - 57:24
Wednesday Feb 07, 2024
Wednesday Feb 07, 2024

Brittany Holmes - Second World: The Warnings 212. This is episode 645 of Teaching Learning Leading k12, an audio podcast.
Brittany Holmes has a passion for educating children. It began with writing on her teachers‛ chalkboards after school. Her favorite feeling was the silky, smooth chalk caked on her fingers. Fast forward many years later, Brittany found herself a mom to Triston, a boy with special needs. Being an educator, she never imagined that she would have a child who struggled academically. Triston is also on the Autism spectrum; and Brittany soon realizes the same feelings that were soothing to her growing up, irritated her son. As much as she loves Triston, she could not deny the difficulty in raising a child with special needs. A huge support to Brittany was her mom, affectionately known as “Nana”. Nana doted on Triston, and displayed patience with him during his most difficult times. Brittany is the author of a children’s book series - A Boy and his Nana.
Brittany Holmes also is the author of the "212" series. Brittany has been an educator for over 20 years. She remembers watching a parent trying to register their child for school. In order for the child to be quiet and not bother the parent, the child was handed a device. When the parent wanted their phone back because they had finished registration, the child threw a fit. They screamed and started kicking. The parent handed the device back and immediately the child calmed down. She witnessed many incidents similar to this over the years. So, when she started the 212 Trilogy, a lot of her personal feelings about technology's impact on people, inspired her writing. The first book in the series, "The Writ 212" was written and published 7 days before the Covid-19 pandemic shut down the world. Many, who were closed in during the pandemic, read her first book "The Writ 212" and found eerie similarities to the content and the state of the world, calling the book insightful and ahead of its time.
During the pandemic, Brittany released the prequel, "The Warnings 212" which delves into the lives of her characters. Again, readers found many parallels to the world's future and the book’s contents. Readers of the 212 series share similar concerns about where the world is headed if we continue our dependency on technology.
Brittany enjoys writing about her passions and uses both the children's book series and science fiction series to share knowledge, spread consciousness, and build relationships with those who have similar thoughts and experiences.
Our focus today is Brittany's latest book - Second World: The Warnings 212.
Thanks for listening and sharing.
Before you go...
You could help support this podcast by Buying Me A Coffee. Not really buying me something to drink but clicking on the link on my home page at https://stevenmiletto.com for Buy Me a Coffee or by going to this link Buy Me a Coffee.
This would allow you to donate to help the show address the costs associated with producing the podcast from upgrading gear to the fees associated with producing the show. That would be cool. Thanks for thinking about it.
Hey, I've got another favor...could you share the podcast with one of your friends, colleagues, and family members? Hmmm? What do you think? Thank you!
Okay, one more thing. Really just this one more thing. Could you follow the links below and listen to me being interviewed by Chris Nesi on his podcast Behind the Mic about my podcast Teaching Learning Leading K12? Click this link Behind the Mic: Teaching Learning Leading K12 to go listen.
You are AWESOME!
Thanks so much!
Connect & Learn More:
https://www.youtube.com/@authorbnholmes212
https://twitter.com/contactbnholmes
https://www.facebook.com/people/BNHolmes/100093262172412/
https://www.instagram.com/authorbnholmes
Second World: The Warnings 212
Length - 50:22
Wednesday Jan 31, 2024
Wednesday Jan 31, 2024

photo by Alex Knight - downloaded from PEXELS
Technology Directors of the School Systems of NGRESA (North Georgia Regional Educational Service Agency): Technology, A.I., and Cybersecurity. This is episode 642 of Teaching Learning Leading K12, an audio podcast.
The technology directors of the five-member school systems of North Georgia Regional Educational Service Agency and the technology director of NGRESA share their thoughts with me about what interested them in technology, what they think about A.I., and a few comments about getting better at cybersecurity. This conversation features - Alan Gayton, Chris Saxon, Joey Satterfield, John Call, Kyle Yates, Patrick Shea, Time Shaver, Shannon Carrol, Bobby Blount, Matt Roper, and Craig Paluszcyk.
Lots to learn.
So much to think about and consider.
Thanks for listening and sharing.
Before you go...
You could help support this podcast by Buying Me A Coffee. Not really buying me something to drink but clicking on the link on my home page at https://stevenmiletto.com for Buy Me a Coffee or by going to this link Buy Me a Coffee.
This would allow you to donate to help the show address the costs associated with producing the podcast from upgrading gear to the fees associated with producing the show. That would be cool. Thanks for thinking about it.
Hey, I've got another favor...could you share the podcast with one of your friends, colleagues, and family members? Hmmm? What do you think? Thank you!
Okay, one more thing. Really just this one more thing. I mentioned in the opening of the show that you could hear me interviewed on Behind the Mic about my podcast Teaching Learning Leading K12. Click this link Behind the Mic: Teaching Learning Leading K12 to go listen.
You are AWESOME!
Thanks so much!
Length - 1:04:47